
Quick Picks for Most Drivers (Featured Snippet Box)
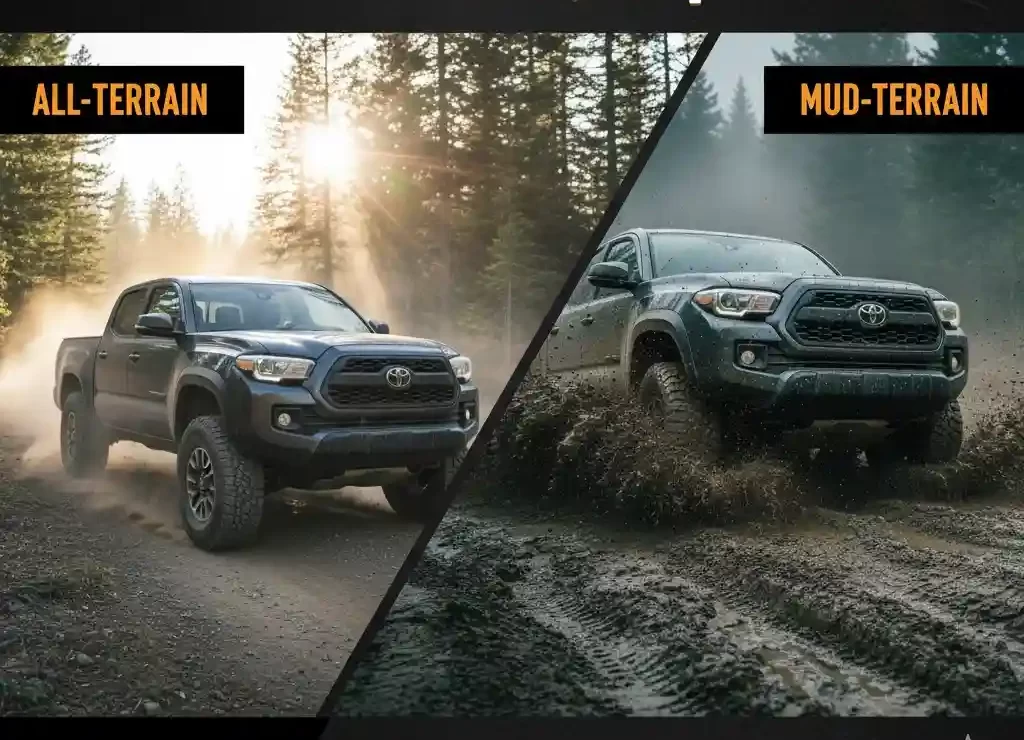
All-Terrain (AT) — Daily Driver Winner
Best for: Daily driver + rain/snow + highway miles.
- Quieter on-road, calmer steering feel
- Better wet/hydroplaning manners (silica + siping)
- Longer tread life; many 3PMSF winter-rated options
Choose AT if you commute, travel in weather, or tow often.
Mud-Terrain (MT) — Trail & Mud Specialist
Best for: Frequent mud/rocks + aired-down crawling.
- Huge voids self-clean in mud; big side-lug bite on rock
- Tougher sidewalls for abuse
- Trade-offs: louder, heavier, typically faster wear
Pick MT if your weekends are slow, technical, and dirty.
R/T (Rugged-Terrain / Hybrid) — The Middle Ground
Best for: Overland rigs & 50/50 mixed use.
- AT-like center rib for road manners
- MT-style shoulders for off-road bite
- Often quieter than MT, grippier than many ATs off-road
Choose R/T if you drive far to get dirty—and drive home happy.
Construction 101 — Why AT and MT Behave Differently
Tires aren’t magic; they’re rubber chemistry on a steel-and-fabric skeleton. Change the recipe and you change the personality. Here’s what’s under the tread—and why All-Terrain (AT) and Mud-Terrain (MT) feel so different.
Tread Pattern & Void Ratio
What you see is what you hear and feel.
Void ratio (gap between lugs): AT = smaller voids for stable road contact and water evacuation at highway speeds. MT = huge voids that self-clean in mud and bite on rock, but they drum on pavement.
Siping density: AT uses lots of fine sipes that open under load to squeegee water and snow (great for wet braking and 3PMSF). MT has limited siping (big blocks need strength), so wet/ice manners suffer.
Stone ejectors & shoulder shape: MTs add ejector ribs and square shoulders for side bite; ATs round the shoulders to reduce noise and help hydroplaning resistance.
Block pitch sequencing (noise): ATs stagger block sizes (variable pitch) to break up harmonics—the “hummm.” MTs’ big, evenly spaced lugs can align into a marching band at 65 mph.
Rule of thumb:
More void = more off-road bite, more noise. More siping = better wet grip, softer block “squirm.”
Compound Chemistry
Rubber is a mood ring: temperature changes its grip.
Silica-rich blends (AT/R/T): Lower glass transition (Tg) = grippy in wet/cold, better hydroplaning resistance and winter braking. Often found on 3PMSF-rated ATs.
Cut/Chip-resistant mixes (MT): Harder, tear-resistant compounds survive rock edges and wheelspin in grit. Trade-off: less micro-grip on wet pavement and longer warm-up in winter.
Heat build-up at highway speed: Softer, heavy lugs flex and generate heat (hysteresis). That’s why MTs can run hotter, wear faster on long freeway slogs, and often carry lower speed ratings.
Pro tip: If you see 3PMSF, you’re looking at a compound designed to stay flexible in the cold; if not, treat winter grip as “enthusiast grade,” not “emergency-stop grade.”
Carcass & Sidewall
The skeleton sets the tone for feel, durability, and air-down performance.
Body plies & belt package: Polyester body + steel belts with a nylon/aramid cap ply stabilize the tread at speed (ATs often use more cap to control heat). MTs may prioritize belt angles and tougher cap fabrics for impact resistance.
Sidewall plies (Load Range C/D/E): More plies and stiffer cords = bruise/puncture resistance and better support when aired down—classic MT strengths. ATs lean slightly softer for comfort and contact conformity on-road.
Shoulder/side lugs: MTs grow aggressive side biters for traction when aired down. ATs keep shoulders tidier to reduce noise and improve wet manners.
Radial vs. bias-ply: Nearly all modern LT AT/MT are radials (better heat control and on-road stability). Bias-ply still exists for specialty crawling/sand but rides harsher.
Translation:
MT = armored sidewalls and big shoulders for abuse. AT = stabilized tread for highway manners.
Weight & Speed Rating
Mass and heat management decide how happy a tire is at 75 mph.
Unsprung/rotational mass: MTs are usually heavier (thicker lugs, beefy sidewalls). More mass means:
Slower acceleration and longer braking distances
More work for shocks (can amplify NVH if damping isn’t matched)
Speed ratings (common LT letters):
Q ≈ 99 mph, R ≈ 106 mph, S ≈ 112 mph, T ≈ 118 mph, H ≈ 130 mph
MTs often sit at Q/R/S; many ATs reach S/T/H thanks to cooler running and cap plies.
Heat is the limiter: At speed, heavy lugs flex → heat → pressure rise. ATs with cap plies and silica compounds shed heat better; MTs need airflow, proper pressure, and reasonable cruising speeds.
Fast Buyer Checklist
Drive mostly pavement or winter roads? Favor AT with 3PMSF and dense siping.
Live in mud/rock parks and air down a lot? Choose MT with reinforced sidewalls and stone ejectors.
Highway towing or long trips? Check speed rating and weight; AT or R/T often ride cooler and straighter.
Any tire, any terrain: Set pressure from load charts, rotate every 5k mi, and road-force balance heavy LT sizes.
Road Noise, Vibration & Harshness You’ll Actually Hear
Your ears don’t care about marketing—they care about voids, rubber, weight, and harmonics. Here’s why some tires sing, some thrum, and some just… behave.
Why MTs Drone (and When They Don’t)
Harmonic frequencies: Big, evenly spaced lugs act like a tread drum. As speed rises, lug impacts line up and excite body panels, usually in the 150–300 Hz band (that “rrrrrr” at 55–70 mph).
Large lug spacing: High void ratio = fewer contact points per revolution → stronger impact pulses and air pumping (think pipe organ for tires).
Square shoulders: Great for side-bite off-road, but they slap pavement edges and add a higher-frequency hiss.
When they don’t:
MTs with variable-pitch blocks (different lug sizes around the tire) smear out harmonics.
Fresh asphalt is quieter than grooved/concrete.
Early, frequent rotations prevent heel-toe wear that amplifies drone.
Slight pressure tweaks (±2 psi from your load-chart baseline) can move resonance out of the annoying zone—don’t exceed safe load pressures.
Quiet Tricks on AT/R/T
Variable pitch sequencing: Different block sizes around the circumference break up tones instead of one loud note.
Tie-bars & 3D sipes: Bridges between blocks and interlocking sipes reduce block squirm, cutting that rubbery “whap-whap.”
Staggered lugs & center ribs: A semi-continuous center rib stabilizes on-center feel; staggered shoulders soften impact edges.
Rounder shoulders: Less slap on lane seams and bridge joints = fewer sharp impulses reaching the cabin.
Cap plies & carcass tuning: Keeps tread growth in check at speed, which reduces vibration as temperature rises.
How to Measure
Get numbers, not arguments.
Phone dB app: Use A-weighting, “slow” response. Mount the phone at ear height, center console.
Test speeds: Record stabilized readings at 40 / 65 / 75 mph.
Two-way average: Run a mile one direction, then the other, average both (kills wind/slope bias).
Log conditions: PSI (cold & hot), pavement type, ambient temp, vehicle load, and rotation mileage.
Compare like-for-like: Same road, same lane, same PSI. Phone mics aren’t lab gear, but they’re great for A/B comparisons.
Tip: Cabin dB is cumulative. A 2–3 dB drop is noticeably quieter; ~10 dB sounds about half as loud.
Fixes
Road-force balance (RFB): Ask for RFB and match-mounting. For LT sizes, push the numbers as low as practical (lower = smoother). Re-balance after chunking or hard rock trips.
Rotate early, rotate often: Every 5,000 mi (or sooner for MT). A 5-tire rotation evens wear and keeps harmonics from building.
Shock & bushing health: Cupping = shocks can’t control the tire. Replace tired dampers, inspect control-arm/track-bar bushings, and check wheel bearings.
Alignment & pressure: A touch of toe-in stabilizes straight-line; set pressures from load charts, not guesses. Over-inflation = slap; under-inflation = squirm & heat.
Wheel fitment: True the system—clean hubs, correct lug torque, and use hub-centric rings if your wheels are lug-centric.
Cabin damping (cheap & effective): A layer of butyl sheets on rear wheel wells + mass-loaded vinyl (MLV) under cargo mats cuts boom. Secure loose panels; rattles masquerade as tire noise.
Bottom line: MTs are loud because physics; AT/R/T are quieter because design. Measure with simple dB methods, then fix the big three: balance, rotation, damping. Your ears (and your passengers) will thank you.
On-Road Safety — Wet Braking, Hydroplaning, Emergency Maneuvers
Rain turns marketing into physics. Here’s how AT, MT, and R/T tires actually behave when the pavement is shiny and your latte is at risk.
Wet/Cold Grip
Sipes + silica win: All-Terrains (and many R/Ts) pack dense siping and silica-rich compounds that stay flexible in cold/wet conditions. That creates thousands of tiny “edges” to squeegee water—why AT/R/T typically beat most MTs in rain and shoulder seasons.
Why MTs struggle: Big, stiff lugs with minimal siping = fewer micro-edges and more block “skate” on films of water. You can drive MTs safely in rain, but they usually need more following distance and gentler inputs.
Winter badge check: If you see 3PMSF, you’re getting a compound designed for cold pliability. If it’s only M+S, treat wet/cold grip as average at best.
Pressure matters: Set highway PSI from load charts, not guesswork. Over-inflated = smaller contact patch (less wet traction). Under-inflated = heat/squirm (longer stops).
Hydroplaning Resistance
Groove volume & evacuation: At speed, water must go somewhere. AT/R/T patterns have more continuous channels that move water out from the contact patch; many MTs rely on huge voids that work in mud but can trap and pump air/water on smooth asphalt.
Tread depth vs water depth: Below 4/32″, wet braking and hydroplaning resistance drop fast—no matter the tread type. Replace earlier if you see frequent heavy rain.
Speed is the lever: Hydroplaning risk skyrockets with speed. A common rule-of-thumb: onset speed (mph) ≈ 9 × √PSI (varies with tread/water depth). Lose 5–10 mph in standing water and you’ll feel grip come back.
Wider isn’t always better: Wide tires can plane sooner in deep water. If you’ve upsized, be extra disciplined with speed and tread depth.
Braking & ABS/ESC Behavior
Mass = distance: Larger LT tires add rotational inertia. Expect longer 60→0 stops versus P-metric street tires, especially with MTs. Mitigation: performance pads/rotors, fresh DOT 4/5.1 fluid, and clean, torqued hubs.
ABS on pavement: On wet asphalt, leave ABS/ESC fully on. The system shortens stops and keeps the truck steerable when a lug hits a slick patch.
Loose-surface modes (gravel/snow): Some vehicles have off-road ABS/ESC that allows a small wedge of material to build in front of the tire. Use those only off-pavement; on wet roads, they usually lengthen stops.
Brake technique: In heavy rain, do a gentle drying brake after deep puddles. For emergency maneuvers, hard, straight-line brake to scrub speed, then steer around—don’t ask big steering and big braking from chunky MTs at the same time.
Quick Safety Checklist
≥ 6/32″ tread for frequent rain; replace ≤ 4/32″.
Set PSI from load charts (cold), re-check hot.
Keep ABS/ESC on for wet pavement.
Upgrade pads/rotors/fluid if you upsized significantly.
In standing water, drop 5–10 mph and widen following distance.
Bottom line: For slick pavement, AT/R/T patterns with silica and siping are your friends. MTs can do the job, but demand more space and smoother inputs—especially when the sky opens up.
Off-Road Traction Matrix (By Terrain, With Aired-Down PSI)
Pick the right tread for the dirt you actually drive—and set pressure like it matters (because it does).
At-a-Glance Traction Matrix
| Terrain | All-Terrain (AT) | Mud-Terrain (MT) | R/T (Hybrid) | Notes / PSI starting points |
|---|---|---|---|---|
| Mud / slick clay | Clogs sooner; better when shallow or mixed with hardpack | Best: large voids self-clean, strong side bite aired down | Good: better clean-out than AT; not as aggressive as MT | Start: Light rigs MT 16–20 psi, AT/R/T 18–22; keep momentum; avoid wheelspin that polishes clay |
| Rocks (ledges, sharp rubble) | Conforms well; watch sidewall exposure | Best aired down: thick sidewalls + big lugs hook edges | Very good: nicer road manners than MT, capable aired down | Start: AT/R/T 16–20 psi, MT 14–18 psi; add 1–2 psi if pinching; use smooth throttle |
| Desert hardpack / whoops | Best stability and heat control at speed | Okay but noisier; can heat up on long transits | Great compromise: stable center + grippy shoulders | Start: AT/R/T 22–28 psi, MT 20–26 psi; prioritize damping and tire temps |
| Sand / dunes | Rounded shoulders float; avoid digging | Works if aired down; tall square lugs can trench | Best overall for mixed sand approaches | Start: Light rigs 10–14 psi (AT/R/T/MT); wider wheels help; gentle inputs—no sharp steering at low PSI |
| Forest / wet roots | Best when siped: micro-edges grip slick wood | Can skate on roots (low siping); careful throttle | Very good: more siping than MT, sturdier than AT | Start: AT/R/T 18–22 psi, MT 18–20 psi; keep speeds low to avoid shear |
| Snow / packed ice | Best with 3PMSF: compound stays pliable, heavy siping | Least consistent on ice; okay in deep fresh snow aired down | Strong: many 3PMSF options; better ice manners than MT | Start: all types 18–24 psi on trail; for pavement, set to load-chart PSI; smooth inputs rule |
Airing-Down Baselines (quick rules):
Light rigs: AT 18–22 psi, MT 16–20 psi.
Heavier rigs: add +2–4 psi to the above.
Beadlocks: expand the safe window 2–4 psi lower off-road (re-torque rings regularly).
Reinflate to load-chart highway PSI before pavement; low pressure + speed = heat + sidewall damage.
Pro tips that save the day:
If you’re spinning, you’re digging—air down or change line.
Hear pinch “pings” on rocks? Add +2 psi.
Sidewall bulge is okay off-road; steering feel and rim protection tell you when you’ve gone too low.
Traction ≠ comfort: match shock damping to your PSI so the tire, not the chassis, absorbs chatter.
Tread Life & Wear Science
Rubber doesn’t “die of old age”—it dies of heat, load, and bad alignment. Here’s how to keep your AT/MTs living their best, grippy life.
Real-World Mileage Ranges
All-Terrain (AT): ~40–65k miles (big spread: highway commuters on 3PMSF ATs live long; heavy rigs + gravel shorten life).
Mud-Terrain (MT): ~25–45k miles (huge lugs = heat & squirm on pavement).
R/T hybrids: typically land between AT and MT for both wear and noise.
What swings the number: speed/heat, vehicle weight, toe/camber settings, rotation discipline, and how often you air down & spin the tires on rocks/mud.
Wear Patterns & Causes
Feathering (sawtooth edges across tread): usually toe out of spec or under-damped suspension.
Fix: Set toe to factory spec (often a touch of toe-in for stability), road-force balance, check control-arm/track-bar bushings.
Inside/Outside shoulder wear: excessive camber or chronic under/over-inflation.
Fix: Reset camber/caster where adjustable; set highway PSI from load charts, not guesses.
Cupping/scalloping (every few blocks): weak/worn shocks or unbalanced tire/wheel.
Fix: Replace dampers, do a road-force balance; rotate sooner.
Heel-toe wear (blocks ramp front→rear): rotation intervals too long; aggressive throttle/braking on MTs.
Fix: Shorten intervals; consider a milder tread if mostly highway.
Quick check: run your palm lightly over the tread. Smooth one way + rough the other = feathering; hollow dips every few inches = cupping.
Rotation Schedules
Intervals: every 5,000 miles for AT/R/T; 3–5k for MT or heavy rigs.
4-tire pattern (non-directional, square setup): rearward cross or X-pattern (fronts to opposite rears, rears straight forward).
5-tire pattern (full-size matching spare): rearward cross with spare:
RR → RF, RL → RR, Spare → RL, FR → FL, FL → Spare (keeps all 5 within ~1/32″).
Directional or staggered: front↔rear on same side only; no crossing.
After rotation: re-torque lugs to spec, recalibrate TPMS if needed, note mileage.
Why 5-tire rotations rock: you spread miles over five casings—effectively ~20% more service life and a usable spare any day of the week.
UTQG & LT Caveats
UTQG = Treadwear / Traction / Temperature, but: many LT-rated AT/MT either don’t carry UTQG or it’s not apples-to-apples across brands (self-certified, tested on different compounds).
How to compare instead:
Initial tread depth (e.g., 16/32″ vs 12/32″)
Weight per tire (heavy = more rubber, but also more heat)
Mileage warranty (if offered) & real fleet/user data
Compound clues: 3PMSF ATs usually wear slower in cold/wet than non-3PMSF MTs on pavement.
Tire Age & Storage
DOT date code: last 4 digits = week + year (e.g.,
3222= week 32 of 2022).Retire by age: inspect closely after 6 years; 10 years max is the common hard stop—off-road abused tires may deserve 6–8 years even with tread left.
Storage best practices:
Cool, dark, dry; away from ozone sources (motors, compressors).
Upright on racks for long-term; short stacks ok if rotated periodically.
Clean, dry, bagged in opaque bags; avoid solvents/shine products that harden rubber.
Store at street PSI if mounted; don’t hang by the bead.
Pro maintenance checklist
Measure tread every oil change (center & shoulders).
Keep ≥ 4/32″ for heavy rain, 6/32″ if you see snow.
Set PSI from load charts; re-check hot after 20–30 minutes of highway.
Road-force balance at install and any time you feel new vibration.
Align after any suspension change—or when you spot feathering.
Sizing & Fitment — Offset, Backspacing, and Rub Points
Tire fitment is geometry with consequences. Get it right and the truck tracks straight, turns clean, and doesn’t eat fenders for lunch. Get it wrong and every U-turn sounds like a paper shredder.
Common Upsizes (33/34/35″) and Wheel Width Pairing
Goal: a stable contact patch, good steering feel, and beads that stay put when aired down.
33″ (e.g., 285/70R17, 285/75R16): Works great on 8.0–9.0″ wheels.
Narrower wheel (8–8.5″) = better bead retention off-road, rounder shoulder for sand/snow.
Wider wheel (9″) = squarer patch, a bit sharper steering on-road.
34″ (e.g., 295/70R17, 285/75R17/18): Sweet spot for many IFS rigs. 8.5–9.0″ is ideal.
35″ (e.g., 315/70R17, 35×12.50R17): 8.5–9.0″ for rocks/air-down; 10″ only if you prioritize street feel/looks and don’t run very low PSI.
Wider wheels + low PSI = higher debead risk; choose carefully if you crawl.
Patch shape rule: Narrower wheel = rounder patch (forgiving, floats better). Wider wheel = squarer patch (crisper turn-in, more edge rub risk).
Offset/Backspacing & Caster Targets
Offset decides what you rub; caster decides how it drives.
Push out (more negative offset / less backspacing): Clears UCAs/sway-bar at full lock but increases outer fender rub and scrub radius (heavier steering, more kickback).
Push in (more positive offset / more backspacing): Tucks tire for fender clearance but risks UCA or frame rub at lock.
Quick backspacing math (17×9 example):
Backspacing (in) ≈ (wheel width+1)/2(\text{wheel width}+1)/2(wheel width+1)/2 + offset(in).
17×9 at +12 mm (~0.47″): ≈ 5.47″ BS.
17×9 at 0 mm: ≈ 5.00″ BS.
17×9 at −12 mm (~−0.47″): ≈ 4.53″ BS.
Caster targets (IFS trucks/SUVs): Aim +3.5° to +4.5° after a lift for straight-line stability and better self-center. Many platforms need UCAs to hit this with 34–35s.
Typical mid-size IFS heuristics (you’ll still trim): 33s: +0 to +15 mm works on many setups. • 35s: −12 to 0 mm common, plus trimming/bump-stops.
Speedometer Error & Effective Gearing
Bigger tires go farther per revolution—your speedo lies low, and your gearing feels taller.
Speedo correction:
Actual Speed=Indicated Speed×New Tire DiaOld Tire Dia\textbf{Actual Speed} = \text{Indicated Speed} \times \frac{\text{New Tire Dia}}{\text{Old Tire Dia}}Actual Speed=Indicated Speed×Old Tire DiaNew Tire DiaExample: Indicated 65 mph, 33″ → 35″ swap ⇒ factor 35/33 ≈ 1.0606 → ~69 mph actual.
Effective axle ratio:
Effective Ratio=Axle Ratio×Old DiaNew Dia\textbf{Effective Ratio} = \text{Axle Ratio} \times \frac{\text{Old Dia}}{\text{New Dia}}Effective Ratio=Axle Ratio×New DiaOld DiaExample: 3.73 with 33″ → 35″ ⇒ 3.73×33/35≈3.523.73 \times 33/35 \approx \textbf{3.52}3.73×33/35≈3.52. That’s why it feels lazier in top gear.
Re-gear target (to restore feel):
Target Ratio≈Original Ratio×New DiaOld Dia\textbf{Target Ratio} \approx \text{Original Ratio} \times \frac{\text{New Dia}}{\text{Old Dia}}Target Ratio≈Original Ratio×Old DiaNew DiaExample: 3.73×35/33≈3.963.73 \times 35/33 \approx \textbf{3.96}3.73×35/33≈3.96 → common choices 4.10–4.56 depending on weight, transmission OD, and terrain.
When to re-gear for 35s: Frequent highway hills/towing, constant gear hunting, or a drop of >8–10% in overall ratio versus stock.
Clearance Checklist (work from easy to invasive)
At full lock, flat ground:
- Sway bar & UCA (inner shoulder), frame (inner rear of front wheel well).
- Fender liner front/rear; use a liner push or heat-gun reform.
At compression (stuffed tire):
- Pinch seam / firewall (front rearward area).
- Body mount on some platforms (e.g., requires mount chop/trim).
- Outer fender lip (rear side on SUVs/pickups).
Hardware & accessories:
- Crash bars (platform-dependent) → delete/relocate kits exist.
- Mud flaps, rock guards, running boards—notorious snag points.
- Bump stops: add or space to protect fenders with 35s.
Rear axle checks:
- Inner fender liner under articulation, bed seam lips, shock bodies/guards.
- Ensure spare tire well fits the upsize (or plan a 5-tire rotation with a matching spare elsewhere)
Fitment order of operations: Set wheels/offset, set caster, test at full lock + full stuff (ramps or a ditch), then trim/space the minimum required.
Bottom line: Choose wheel width for bead control, offset for what you want to rub, and use caster and smart trimming to make big tires drive like stock—minus the stock look.
Winter & Mountain Use — 3PMSF vs M+S
Snow turns tire marketing into chemistry class. Here’s how to pick tread that grips when roads go frosty and grades get steep.
What 3PMSF Actually Means
3PMSF = Three-Peak Mountain Snowflake, a severe-snow service badge earned in a standardized packed-snow test (vs. a reference tire). It’s a performance standard, not a vibe—tires must meet a minimum traction index to wear the symbol.
Not magic: Pressure and tread depth still decide your stopping distance. In winter, set highway PSI from load charts (cold morning pressures), and remember pressure drops ~1 psi per 10°F.
Depth matters: Aim for ≥6/32″ before serious snow trips; by 4/32″ winter grip falls off a cliff.
M+S (“Mud & Snow”) ≠ winter tire. M+S is a geometry designation (groove/void), not a cold-grip compound test. Many M+S-only tires harden up when temps dive.
Real Snow/Slush Behavior
Why siped AT/R/T stop shorter: Dense sipes open like little squeegees and silica compounds stay pliable near freezing. That’s why many 3PMSF All-Terrain (and some R/T) models brake and turn more confidently on slush and packed snow than most MTs.
MT edge cases: In fresh, deeper powder, a wide aired-down MT can float and churn well. But on polished ice or refrozen intersections, big blocks + low siping = skating rink vibes. Leave longer gaps and brake straighter.
Airing down (trail vs road): Slight reductions help on snowy tracks off-pavement, but on plowed highways keep load-chart PSI for stability, heat control, and proper ABS behavior.
Chains & Legalities
Know the law: Mountain passes post chain controls by level. Some states accept 3PMSF LT tires as “snow traction” until a higher level mandates chains on all drive wheels (4×4 may still need chains). Always follow posted/DOT rules.
Fitment with upsized tires:
- Test-fit at home: rotate by hand and check inner clearance at brake lines/ABS wires, upper control arm, shock body, sway bar, and leaf springs.
- Watch fender liners and mud flaps at full lock and mild compression. Trim or remove flaps if they snag.
- If clearance is tight, use low-profile cable chains rated for limited-clearance (SAE Class S) and follow speed limits (typically 25–30 mph max).
Install tips that save your knuckles:
- Put chains on the drive axle first; for 4×4 in heavy controls, chain both axles if required for steering/braking balance.
- Valve stems outboard, tensioners facing away from them. Re-tension after 100–200 yards.
- Carry gloves, a tarp, and a headlamp. Your future self thanks you.
Quick Winter Checklist
3PMSF tires with ≥6/32″ tread before big trips
Morning cold PSI set from load charts (+ recheck hot after 20–30 min)
Chains/cables test-fit on your exact size & offset
Verify spare tire fits caliper/axle if needed
Pack defroster, scraper, tow strap, shovel, traction boards
Bottom line: For real winter roads, 3PMSF AT/R/T tires with the right pressure and tread depth beat most MTs. Add properly fitted chains when the sign says so, and you’ll climb (and stop) with confidence.
Towing, Payload & Stability
Big trailer, big expectations. Your tires are the only part of the rig that actually touches physics—so set them up to win.
Load Index, Ply/Load Range (C/D/E)
What they mean (and why you feel it):
Load Index (LI) = the tire’s max weight per tire at a specific pressure (printed on the sidewall). Higher LI = more capacity.
Load Range is the old “ply‐rating.”
- C (≈50 psi max): lighter trucks/SUVs, nicest ride.
- D (≈65 psi max): middle ground.
- E (≈80 psi max): heavy tow/payload, stiffer sidewalls.
Stiffness vs comfort: Stiffer sidewalls (D/E) resist squirm and sway with trailers, but ride firmer. Too-stiff on a light truck can reduce rough-road grip (the tire skips).
Heat at highway speed: Load + speed + underinflation = heat, and heat kills tires. Choose the lowest Load Range that still meets your axle/tongue weight, then set pressure from load charts (not guesses).
Pro tip: Don’t exceed your wheel’s max pressure/load. Tire says 80 psi? Your wheel might not.
Pressures From Load Charts
How to set towing PSI like a pro (5 steps):
Weigh it loaded (truck + trailer): get front and rear axle weights (CAT scale).
Per-tire load = axle weight ÷ 2 (dual = ÷ 4).
Open your tire maker’s load/pressure chart → find PSI that carries that per-tire load.
Add a small margin (+5–10%) and round to a practical PSI.
Check hot after 20–30 min of highway: a normal rise is ~2–6 psi. Large rises = start higher cold.
Chalk test is sanity only. It can’t replace charts when you’re towing.
Front vs rear: Often the rear needs more PSI under tongue weight; fronts may need a touch more PSI too if you’re nose-heavy.
Seasonal note: Pressure drops about 1 psi per 10°F. Set morning cold PSI.
Trailer Sway & Braking
Why AT/R/T usually beat MTs for tow duty:
AT/R/T: continuous center ribs, more siping, and steadier blocks = better on-center tracking and wet braking.
MT: big voids + tall blocks = squirm and longer stops on pavement—fine for trails, not ideal for long tows.
Kill sway at the source:
Tongue weight: Target 10–15% of trailer weight on the hitch. Too light = instant sway.
Weight-distribution hitch for bigger loads; set bars so front axle weight is restored close to unhitched.
Alignment: A touch more caster (where adjustable) improves straight-line stability after lifts.
PSI: Set by charts. Too low = mush; too high = less grip and hop.
Brake like you mean it (and stop):
Upgrade to severe-duty pads and quality rotors if you upsized tires.
Flush DOT 4/5.1 brake fluid every 2 years (more often if you tow in mountains).
Trailer brake controller: In an empty lot, do a few 20→0 mph stops and tune gain so the trailer helps, not yanks. Test the breakaway system.
Use engine/trans tow-haul for downhill control; don’t ride the brakes.
Quick Tow-Day Checklist
Tires meet Load Index for your scaled axle/tongue weights
Cold PSI set from charts (front/rear noted), lugs torqued
AT/R/T tread ≥ 6/32″ for wet stopping; MTs only if your trip is trail-heavy
Trailer tongue 10–15%, WD hitch set, sway control engaged
Controller gain dialed; fresh brake fluid; full-size spare with tools
Bottom line: Match load range to the job, set PSI from charts, pick AT/R/T for paved stability and wet braking, and tune the hitch + brakes. That’s the recipe for a calm wheel and short stops.
Balancing & Alignment — Keep It Smooth
Big LT tires can ride like velvet—or like a paint shaker. The difference is usually balance quality and alignment math. Here’s how to get glassy at 75 mph and planted in crosswinds.
Road-Force Balancing vs Beads
What they are (and when to pick which):
Standard spin balance: Adds weights to cancel heavy spots. Fine for street tires; often not enough for chunky AT/MTs.
Road-Force Balance (RFB): A roller loads the tire while spinning to measure radial force variation (RFV)—the up/down stiffness that causes shake even when “balanced.” The tech then match-mounts the light spot of the wheel to the stiff spot of the tire to minimize weights and RFV.
- Use RFB when: tires are 33″+, MTs/aggro R/Ts, you feel shimmy 55–75 mph, or a tire took a lot of weight.
- Targets to ask for:
Passenger/LT 32–35″: < 15 lb RFV (ideal < 10 lb).
35–37″ and beadlocks: < 25 lb is realistic.
If a casing can’t get close, swap that tire for another one.
Re-balance when: you chunk/scallop a tread, bend a wheel, reseat beads, rotate and pick up a new vibe.
Internal balance beads: Small ceramic beads inside the tire dynamically migrate opposite heavy spots.
- Pros: No external weights to get knocked off, self-adjusts as the tire wears, handy for rigs that see mud/snow and frequent cleaning.
- Cons: Can be inconsistent at higher speeds if moisture gets in (use dry air), some beads and TPMS don’t play nice, and they don’t correct radial stiffness (RFV).
- Use beads when: steel wheels/beadlocks, lots of off-road, <85 mph highway habits, and you want low-maintenance balancing.
- Do not mix beads and clip/adhesive weights on the same wheel.
Fast diagnosis by speed band
45–60 mph steering-wheel shimmy: front balance/RFV.
60–75 mph seat-of-pants buzz: rear balance/RFV.
Brake-only shake: rotors or hub mating surface, not tire balance.
Cold “thump” that fades: flat-spot from overnight, normal on some LT casings.
Pro setup checklist
Ask for RFB + match-mount; request the RFV numbers on the receipt.
Use hub-centric rings if wheels are lug-centric; clean hub faces, torque lugs properly.
Set tire pressures before balancing (PSI changes balance).
Alignment Targets
Get these right and the truck tracks straight, the wheel returns to center, and the tires wear square.
Toe (the tire handshake)
Aim a touch of total toe-in for highway stability: +0.05° to +0.15° total (≈ 1/32″–1/16″ total).
Too much toe-in = feathering and scrub; toe-out = dartiness and inside wear.
Camber (tilt)
Keep near zero on-road: 0° to −0.3° per side is a safe target for most IFS/solid-axle trucks.
Big negative camber chews inner shoulders; unequal camber pulls.
Caster (self-center feel)
More positive caster = stronger straight-line stability and better return-to-center (but heavier steering).
Typical targets after a lift:
IFS midsize/full-size (Tacoma/4R/Frontier/Bronco, etc.): +3.5° to +4.5°. Many rigs need aftermarket UCAs to get there.
Jeep JL/JT solid axle: +4.5° to +6.0° on 35s (watch pinion angle; use adjustable control arms).
JK/older solid axle: +4.0° to +7.0° depending on tire size and steering feel.
Cross-caster: Up to +0.2° more on the right counters road crown pull.
Before you align (and after)
Set tire PSI from load charts first.
Center the steering wheel (many ESC systems get grumpy if it’s off).
Ask for a printout with before/after numbers; re-check after 500–1,000 miles of new suspension settling.
Bonus geometry sanity checks (common lift gotchas)
Bump steer: Keep drag link and track bar angles parallel on solid axles.
Panhard/track bar: Re-center solid-axle housings after a lift to avoid off-center rub.
Thrust angle: Rear axle skew will make the truck crab even if front numbers look perfect.
Bottom line: Use road-force balance to tame big lugs, keep pressures honest, and set toe ~slight in, camber ~zero, caster ~+4° (platform-dependent). Do that, and even 35s can feel like a luxury car—just taller and meaner.
Side-by-Side Comparison (Place Near Top as HTML Table)
All-Terrain vs Mud-Terrain vs R/T (Hybrid) — Quick Comparison
| Factor | All-Terrain (AT) | Mud-Terrain (MT) | R/T (Hybrid) |
|---|---|---|---|
| Daily road noise | Low–Medium (variable-pitch blocks; calmer center) | High (big voids = harmonics/drone) | Medium–Low (quieter than MT, a touch louder than AT) |
| Wet braking | Strong (silica + siping; many 3PMSF options) | Fair (limited siping; longer stops on slick asphalt) | Good (keeps siping; some 3PMSF models) |
| Hydroplaning | Best (continuous channels evacuate water) | Weakest (voids pump air/water; needs lower speed) | Good (better channels than MT) |
| Rock (aired down) | Good–Very good (conforms; watch sidewall exposure) | Best (thick sidewalls + big shoulder lugs) | Very good (MT-style shoulders with calmer manners) |
| Deep mud | Fair (clogs sooner) | Best (large voids self-clean) | Good (better clean-out than AT, not MT-level) |
| Snow / ice | Best (with 3PMSF) — pliable compound + siping | Inconsistent on ice; ok in fresh powder aired-down | Good; choose 3PMSF for four-season use |
| Tread life | Longer (~40–65k mi use-case dependent) | Shorter (~25–45k mi; heat & lug squirm) | Middle (~35–55k mi typical) |
| Weight / MPG | Lighter / Better (lower rolling resistance) | Heavier / Worse (more heat & mass) | Middle (usually lighter than MT) |
| Best for | Daily + rain/snow + highway; towing; long trips | Frequent mud/rocks; aired-down crawling; dedicated trail rigs | Overland & mixed use; drive far to get dirty and drive home happy |
Decision Tree — Choose in 60 Seconds
All-Terrain vs Mud-Terrain vs R/T — 60-second picker
- How much pavement?
60–80% highway + real winters → AT (3PMSF)
~50/50 mixed + occasional mud/rocks → R/T (Hybrid)
<30% road + frequent mud/rocks → MT - Tow or carry heavy often?
Prioritize AT/R/T with higher Load Index and stiffer Load Range (D/E). - Live with snow/ice?
Prefer 3PMSF (many AT, some R/T). MT only if trails-first and you accept longer wet/ice stops. - Noise tolerance?
Hate drone → AT. OK with some hum → R/T. Trail wins over quiet → MT. - Tire size jump (34–35″) + hills/towing?
Budget for re-gear or shift recal; choose lighter casings to protect MPG & heat.
Fast picks:
- Daily driver + winters: AT (3PMSF) — quiet, safer wet/ice manners.
- Overland 50/50: R/T — AT-like center, MT shoulders, still civil on-road.
- Mud/rocks most weekends: MT — big voids, tougher sidewalls; accept noise/wear.
- Frequent towing: AT/R/T with high Load Index; set PSI from load charts.
One-liners
60–80% highway + winters → AT (3PMSF): quieter, better wet/hydroplaning, longer tread life.
50/50 mixed + occasional mud/rocks → R/T: AT-like center, MT shoulders; great overland balance.
<30% road + frequent mud/rocks → MT: max clean-out and side-bite; louder, heavier, faster wear.
Towing heavy often? Favor AT/R/T with higher Load Index/Load Range and set PSI from load charts.
Platform Playbooks (Real Use-Cases)
Dial your pick by platform, then copy-paste the setup notes into your build sheet.
Tacoma/4Runner (IFS Daily + Trails
Best tread: AT or R/T (3PMSF if you see winters). MT only if you wheel mud/rock often.
Common sizes: 33″ (285/70R17), 34″ (285/75R17 or 295/70R17), 35″ (315/70R17).
Wheel/offset:
• 33s: +0 to +15 mm usually clears UCAs with minor liner push.
• 34–35s: 0 to −12 mm typical; expect liner heat-reform, pinch-seam massage, and often a body-mount chop on 4R/Taco.Alignment targets: Caster +3.5°–4.5° (often requires UCAs), camber ~0°, slight toe-in. More caster = better straight-line with big tires.
PSI (starting points, LT E-load): Highway 36–40 psi empty, 40–44 psi loaded/towing. Trail: AT/R/T 18–22, MT 16–20 (add +2–4 psi for heavy armor).
Notes: Re-aim headlights post-lift; speedo/TPMS recal for 34–35s; consider re-gear if hunting gears with 35s.
JL/JT Weekend Rock
Best tread: MT or R/T; AT for snow/highway-heavy builds. Do 5-tire rotations.
Common sizes: 35″ on mild lift; 37″ with 2.5–3.5″ + proper bump-stops.
Wheel/offset/backspacing: ~4.5–4.75″ BS on 17×8.5–9.0 (≈ −12 to 0 mm). Keep scrub radius reasonable for steering feel.
Alignment/geometry: Caster +4.5°–6.0° (adjustable arms), slight toe-in, re-center axles with track bars, set bump-stop to protect fenders.
Driveline: 37s push you toward 4.88–5.13 gears (engine/OD dependent).
Balance/maintenance: After rock trips, road-force balance—MT chunking shows up as 60–75 mph shimmy.
PSI: Highway 34–38 (E-load). Trail: 12–16; beadlocks can run 8–12 (watch sidewall/valve stems).
Bronco Sasquatch
Best tread: Ships on MT 35s; swap to R/T or 3PMSF AT for winter grip and lower highway drone.
Upsize notes: 37s need careful wheel specs, crash-bar deletes, liner clearancing, bump-stop spacing, and ideally re-gear.
Electronics: Re-aim headlights, recal speedo/ADAS; keep radar/parking sensors unobstructed with bigger rubber.
Steering/Tie-rods: If you air down and jump dunes/rocks, consider tie-rod sleeve/brace upgrades.
PSI: Highway 38–42 empty, more when loaded. Trail 14–18 (lighter if beadlocks).
Why switch to R/T/AT: Better wet braking, calmer on-center, and improved hydroplaning resistance vs MT—perfect for long freeway slogs to the trail.
Half-Ton Overland (F-150/Tundra/Ram)
Best tread: AT (E-load) for towing stability; R/T for desert two-tracks and mixed use. MT only if your trips are mud/rock-heavy.
Sizes & gearing: 34–35″ common. Expect effective-ratio drop; many builds feel “right” again at 4.10–4.56 (platform/engine/OD dependent).
Towing: Set highway PSI via load charts (scale your axles). Use weight-distribution hitch on heavier trailers; target 10–15% tongue weight.
Brakes/heat: Bigger tires add inertia—upgrade pads/rotors, flush to DOT 4/5.1, and watch tread temps on long grades.
PSI: Empty highway 38–42; loaded/towing 42–50 rear depending on axle weight and wheel rating. Trail 18–24 (vehicle weight decides).
Desert running: R/T + quality dampers (HS compression control) = stability in whoops with less heat than MT.
Pro tip: Lock your choice with use-case first (commute vs trails vs tow), then set caster, offset, PSI, and trim the minimum needed. That order keeps big tires driving like they belong there.
Testing You Can Repeat (Bring Data)
No opinions—just numbers. Here’s a simple, repeatable test plan you can run today and re-run after rotations, pressure changes, or tire swaps.
Noise Test
Goal: Compare cabin noise at common cruise speeds.
Tools: Phone dB app (A-weight, “Slow”), phone mount at ear height, cruise control, tire pressure gauge.
Setup (control your variables):
Set cold PSI from load charts; warm the tires with 10 min of steady driving.
Same lane, direction pair (out & back), windows up, HVAC on low, same load in the vehicle.
Log air temp, pavement type, tread depth (center), and wind (calm is best).
Procedure:
Hold 40 / 65 / 75 mph for ~30 seconds each direction on the same stretch.
Record the stabilized reading; two-way average each speed to cancel wind/grade.
Do 2–3 sets; toss any run with traffic interference.
How to read it:
−3 dB ≈ clearly quieter; −10 dB ≈ about half as loud to your ear.
If noise rises after rotation, check balance/feathering before blaming the tire.
Wet-Lot Braking
Goal: See real wet-pavement stopping differences.
Safety first: Use an empty, permitted lot (ask!), a spotter, cones, and avoid pedestrians/obstacles. Keep ABS/ESC ON on wet pavement.
Tools: 4 cones, tape measure/measuring wheel (or GPS overlay), bucket/hose to wet a lane, tire gauge.
Setup:
Light, uniform water film (not deep puddles).
Warm brakes with a few gentle stops.
Same load, same PSI as noise test.
Procedure:
From 30 mph, brake straight & hard to ABS activation, hands straight.
Mark start/stop with cones; measure 30→0 distance.
Run 5 passes each direction; discard the longest/shortest, average the middle 6.
Note ABS feel (smooth chatter vs. ice-skate) and any pull.
What you’ll learn: Siped AT/R/T typically stop shorter than blocky MT on slick asphalt. If distances vary wildly, look at PSI mismatch, pad glazing, or balance.
Trail Loop
Goal: Compare traction and heat off-road without racing.
Pick a loop: 0.5–1.5 miles you can repeat safely (e.g., graded climb + small ledges + off-camber). Run the same lines each time.
Log each run:
Surface: dry/damp/wet, temp, altitude.
Pressures: cold & hot (post-run).
Times: total loop time (not a sprint—steady pace).
Events: number of wheelspin events (>1 sec), locker uses, spots you had to back up.
Temps: IR thermometer on tread inner/middle/outer and sidewall after the loop.
Compare one variable at a time:
AT vs R/T vs MT at the same PSI, then repeat at aired-down pressures.
Note subjective steering feel, impact harshness, and carcass stability on off-camber.
| Date | Tire & Size | Load Range | PSI (cold/hot) | Tread (32nds) | Ambient / Surface | dB 40 | dB 65 | dB 75 | 30→0 Wet (ft) | Trail Time | Spin Events | Notes |
|---|---|---|---|---|---|---|---|---|---|---|---|---|
| — | — | C/D/E | — / — | — | —°F / asphalt | — | — | — | — | —:— | — | Balance/feel, hydroplaning, etc. |
Pro Tips:
Re-check PSI hot after highway or trail—big rises mean you started too low.
If your two-way dB averages are within ±2 dB, call it a tie; spend effort on balance/rotation instead.
For wet braking, replace ≤4/32″ before the rainy season—data will show why.
Trail testing: if you hear pinch pings, add +2 psi; if you’re trenching, air down.
Ownership Math — Cost per Mile & ROI
Rubber is a subscription. The trick is knowing what you’re paying per mile—and whether that “gnarly tread” aesthetic tax is worth it.
Price Ranges & Expected Life
Typical U.S. street pricing for popular 17–20″ sizes (per tire) and real-world life if you rotate on time and keep alignment/PSI dialed.
| Tire Type | Typical Price* | Real-World Life** | Notes |
|---|---|---|---|
| All-Terrain (AT) | $180–$350 | 40–65k mi | Quieter, lighter; many 3PMSF options; best $/mi for daily use. |
| Mud-Terrain (MT) | $220–$450 | 25–45k mi | Big voids = heat/squirm on highway; great off-road, higher $/mi. |
| R/T (Hybrid) | $200–$400 | 35–55k mi | AT-like center, MT shoulders; usually middle of the $/mi pack. |
* Brand/size/load range swing this a lot.
** Payload, speed, surface, and rotation discipline decide where you land.
Hidden line items to budget: one road-force balance at install, rotations every 5k (or 3–5k on MTs), at least one alignment after suspension changes. If you upsize, add speedo recal; maybe re-gear with 35s+ (not a tire cost, but a lifetime MPG/drivability cost/benefit).
Cost-per-Mile Calculator
Cost per Mile (CPM) Calculator
Optional: fuel impact (MPG change)
How to read it (example):
R/T set $1,200 + services $180, life 45,000 mi → (1200+180)/45000 ≈ $0.0307/mi (3.1¢/mi).
If upsizing drops you from 17 → 16 mpg at $4/gal, fuel adds ≈ 1.47¢/mi, making the total ≈ 4.6¢/mi. That’s the real subscription price of your tread choice.
Pro tips:
5-tire rotations often net ~+20% life and keep harmonics down → better CPM.
Heavier casings raise fuel CPM—sometimes more than the tire CPM difference between models.
Resale/Take-off Value
You can claw back cash at the end—or even at the beginning.
Popular AT sizes hold value: 265/70R17, 285/70R17, 275/65R18, 35×12.50R17—especially with ≥7/32″ remaining and recent DOT dates. MTs in niche sizes/bolt patterns are tougher to move.
List like a pro: photos of tread depth gauge, clear DOT date, no dry rot, even wear, and your city for local pickup. Bundled 5-tire sets sell faster to overlanders.
“Take-offs” arbitrage: New-truck owners dump stock ATs/wheels—buy cheap, run, and resell; or sell your barely-used set when you upsize.
ROI beyond resale: A quieter AT/R/T might save 1–2 dB (less fatigue), stop shorter in rain (fewer oh-no moments), and reduce rebalancing visits. Those are soft returns—but real.
Bottom line:
Do the CPM math, then add the fuel delta and your use-case. If you commute and tow, a quality 3PMSF AT often wins the spreadsheet war. If you live on slick clay, an MT earns its keep—just budget the extra cents per mile. If you do both, an R/T frequently hits the sweet spot: sane CPM, solid grip, and fewer apologies on the highway.
FAQs (Add FAQ Schema)
Are MTs unsafe in rain?
Not inherently—but they stop longer and hydroplane sooner than AT/R/T because of big, low-sipe blocks. Slow down, leave space, keep cold PSI from load charts, and if storms are common, consider a siped MT or switch to a 3PMSF AT/R/T.
Do ATs work in mud?
Yes—for shallow or mixed mud they’re fine, especially aired down. In deep, slick clay they clog and spin. If mud is your weekend hobby, an MT’s self-cleaning voids are the right tool.
What’s 3PMSF vs M+S?
3PMSF (Three-Peak Mountain Snowflake) = passed a severe-snow traction test on packed snow (compound + siping that actually works cold).
M+S = tread geometry marking only—not a winter performance test.
How often should I rotate?
AT/R/T: ~5,000 miles. MT or heavy rigs: 3–5k. If your spare matches, do a 5-tire rotation to add ~20% life and keep wear even. Re-balance when vibes show up; re-align if you see feathering/inside-edge wear.
Recommended Next Steps
You’ve got the facts—now let’s turn them into a setup that drives straight, stops short, and stays quiet.
Free Fitment Help
Drop this template and we’ll reply with AT/MT/R/T picks + starting pressures tailored to you:
Comment template:
Year/Make/Model/Trim: 2019 Toyota 4Runner TRD Off-Road
Tire Size (current/target): 265/70R17 → 285/70R17
Wheel Width & Offset: 17×8.5, +0 mm
Lift/Armor: 2″ lift, steel front bumper, no sliders
Climate: Denver—snow/ice winters, hot summers
Driving Mix: 70% highway, 20% dirt, 10% rock
Towing/Load: Teardrop trailer, 2–3x per month
Current PSI (cold): 38F/38R
Pain Points: highway drone, wet braking, slight rub at full lock
Shop the Parts You’ll Actually Use
Wheels & Tires:
/shop/wheels-tires— sizes, offsets, bead-friendly widths for 33/34/35s.Tire Accessories:
/shop/tire-accessories— TPMS, stems, balancing, beadlocks, valves.Air Systems:
/shop/air-compressors— onboard compressors, hoses, deflators for fast air-down/air-up.Recovery Gear:
/shop/recovery-gear— kinetic ropes, soft shackles, traction boards (because mud happens).
Tip: If you’re jumping to 35s, add a speedo/TPMS recal and consider re-gear bundles listed in those categories.
Quick CTA Buttons
<div class=”cta-grid” aria-label=”Next steps”>
<a class=”btn primary” href=”/shop/wheels-tires”>Shop Wheels & Tires</a>
<a class=”btn” href=”/shop/tire-accessories”>Shop Tire Accessories</a>
<a class=”btn” href=”/shop/air-compressors”>Shop Air Compressors</a>
<a class=”btn” href=”/shop/recovery-gear”>Shop Recovery Gear</a>
<a class=”btn outline” href=”#comments”>Get Free Fitment Help</a>
<a class=”btn outline” href=”/downloads/tire-choice-pressure-worksheet.pdf”>Download Worksheet (PDF)</a>
</div>
<style>
.cta-grid{display:grid;gap:.6rem;grid-template-columns:repeat(auto-fit,minmax(220px,1fr));margin-top:.5rem}
.btn{display:inline-block;text-align:center;padding:.75rem 1rem;border-radius:10px;border:1px solid #e5e7eb;background:#fff;color:#111;font-weight:600;text-decoration:none}
.btn.primary{background:#0ea5e9;color:#fff;border-color:#0ea5e9}
.btn.outline{background:transparent}
@media (prefers-color-scheme:dark){
.btn{background:#0f172a;color:#e5e7eb;border-color:#334155}
.btn.primary{background:#38bdf8;border-color:#38bdf8;color:#0b1220}
}
</style>


